
Developers typically use advanced techniques like canary, blue/green, and incremental deployments to reduce risk when practicing progressive delivery, a facet of continuous delivery (CD). In this tutorial, we will show you how to use feature flags, another progressive delivery option developers can use to test while in production.
What is progressive delivery?
Progressive delivery is the ability to test in production while controlling your audience of who can exercise or see updates to an application with a high level of granularity. This approach can also be thought of as developer experimentation.
What are feature flags
Feature flags enable you to choose what to deploy and who to deploy to in production. They allow you to define the audience for your application updates as well as the fashion in which they will be served.
Feature flags help stakeholders reduce risk, allowing them to do controlled testing of features and separate feature delivery from customer launch.
Benefits of feature flags
The following are benefits of GitLab's feature flags.
- Lower risk. Feature flags prevent unscheduled outages, control your audience in a fine-grained fashion, and can be optionally used in conjunction with canary deployments.
- Ease of use. Feature flags have simple configurability and instrumentation, support user lists, and offer built-in service.
- Language agnostic. Our feature flag implementation supports all of the main programming languages.
- Better compliance and audit capabilities. The GitLab platform automatically records all feature flags actions.
Tutorial requirements
This is what you need for this tutorial:
- A GitLab account on gitlab.com SaaS
- Flux CLI installed on your local desktop (on my Mac, I installed it by executing
brew install fluxcd/tap/flux) - A running Kubernetes cluster, i.e. a GKE cluster with 3 e2-medium nodes
kubectlconnectivity to your Kubernetes cluster from a local Terminal window on your desktop
About this feature flag tutorial
This tutorial is based on a fictitious application, which is a simplified inventory system. The goal of this tutorial is to show you how to create, configure, and implement a feature flag using GitLab.
Note: This tutorial is for learning purposes and not meant to deploy a production-ready architecture. Also, to keep the number of steps low, masked variables and sealed secrets are not being used throughout this tutorial.
Flux and the GitLab agent for Kubernetes
Here is how to install Flux and GitLab agent for Kubernetes.
- Log on to your GitLab workspace.
- Create a personal access token (PAT) from your GitLab account by navigating to User settings > Preferences > Access tokens. In the Personal Access Tokens section, click on the Add new token button on the righthand side of the section. For Token name, enter
pat-for-flux. Leave the expiration date with its default (it should be 30 days from its creation) and select the API scope for your PAT. Click on the Create personal access token button to create your PAT. Copy and save the value of your PAT; you will need it at a later step.

Creating a personal access token
- Head back to your GitLab workspace main page.
- Create a group named “hn” by clicking the button New group (or New subgroup if you are creating this group inside an existing group) on the top right hand side of your screen, and then clicking on the Create group tile. Enter "hn" for your Group name and click on the Create group button to create it. Leave the rest of the fields with their defaults.
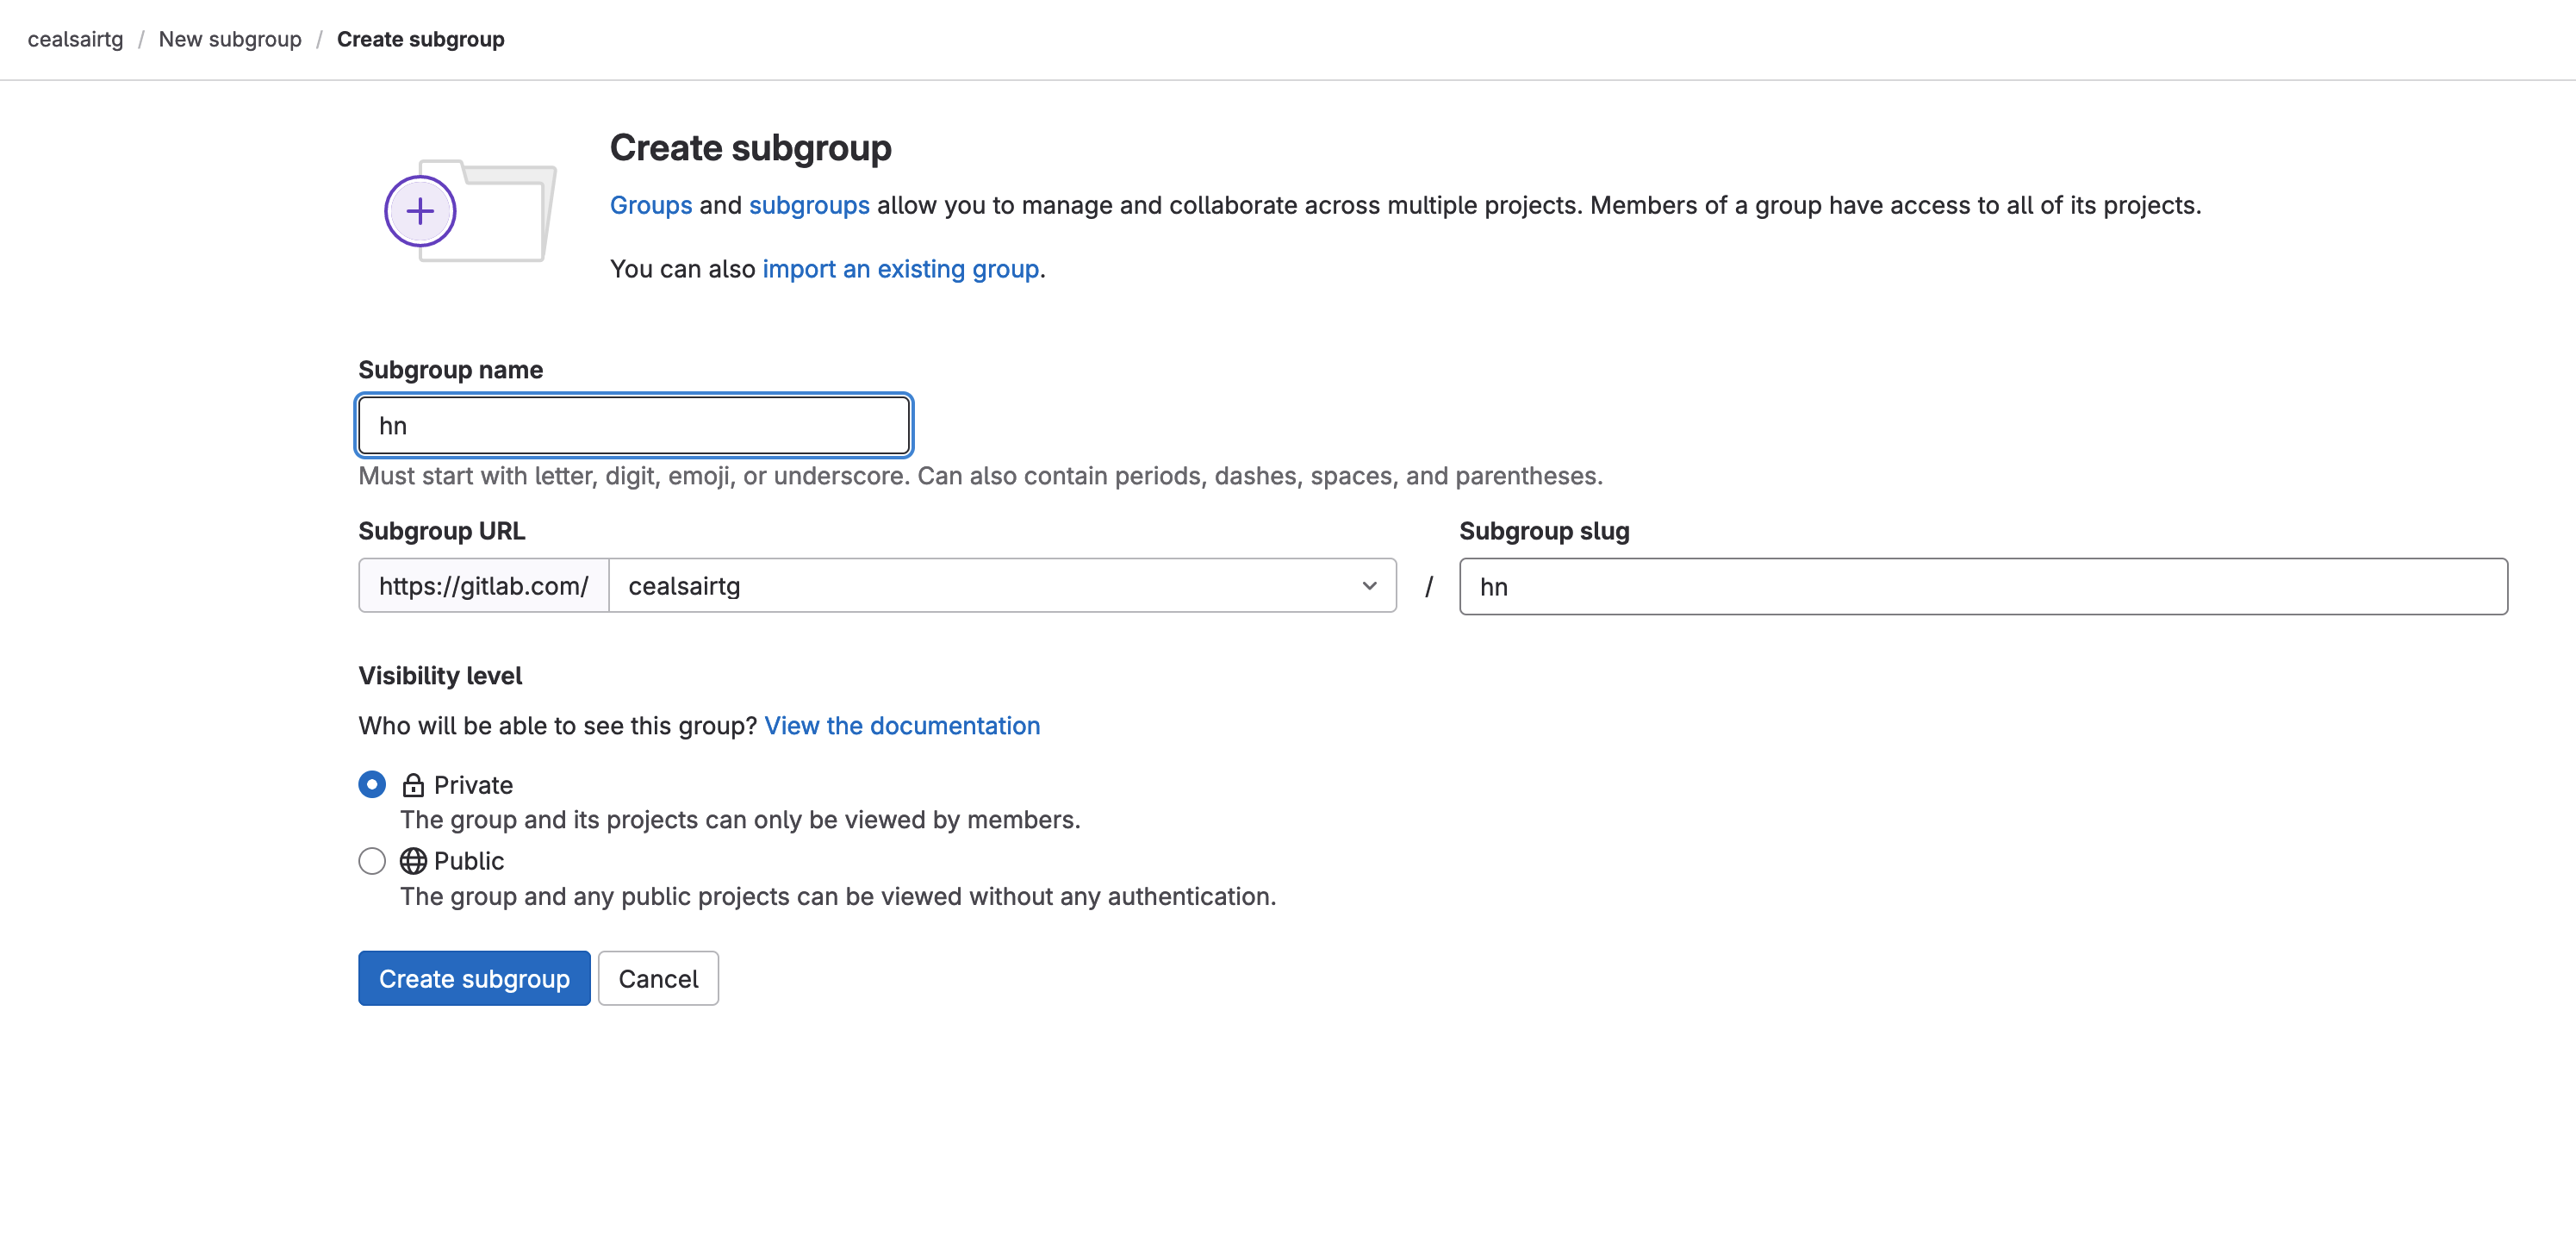
Creating group "hn"
- Inside group “hn”, create project “flux-config” by clicking the New project on the top righthand side of your screen and then clicking on the Create blank project tile.

Creating project "flux-config"
- From the Terminal window with
kubectlaccess to your Kubernetes cluster, export your PAT by entering the following command:
export GITLAB_TOKEN=
<replace with your PAT value>
- From the Terminal window with
kubectlaccess to your Kubernetes cluster, bootstrap Flux by executing the following command:
Note: Make sure to replace <your path> with whatever precedes your group “hn”. For example, it could be --owner=tech-marketing/sandbox/hn, or if your group “hn” is at the very top level of your GitLab workspace, it would be --owner=hn.
flux bootstrap gitlab \
  --owner=<your path>/hn \
  --repository=flux-config \
  --branch=main \
  --path=clusters/my-cluster \
  --deploy-token-auth
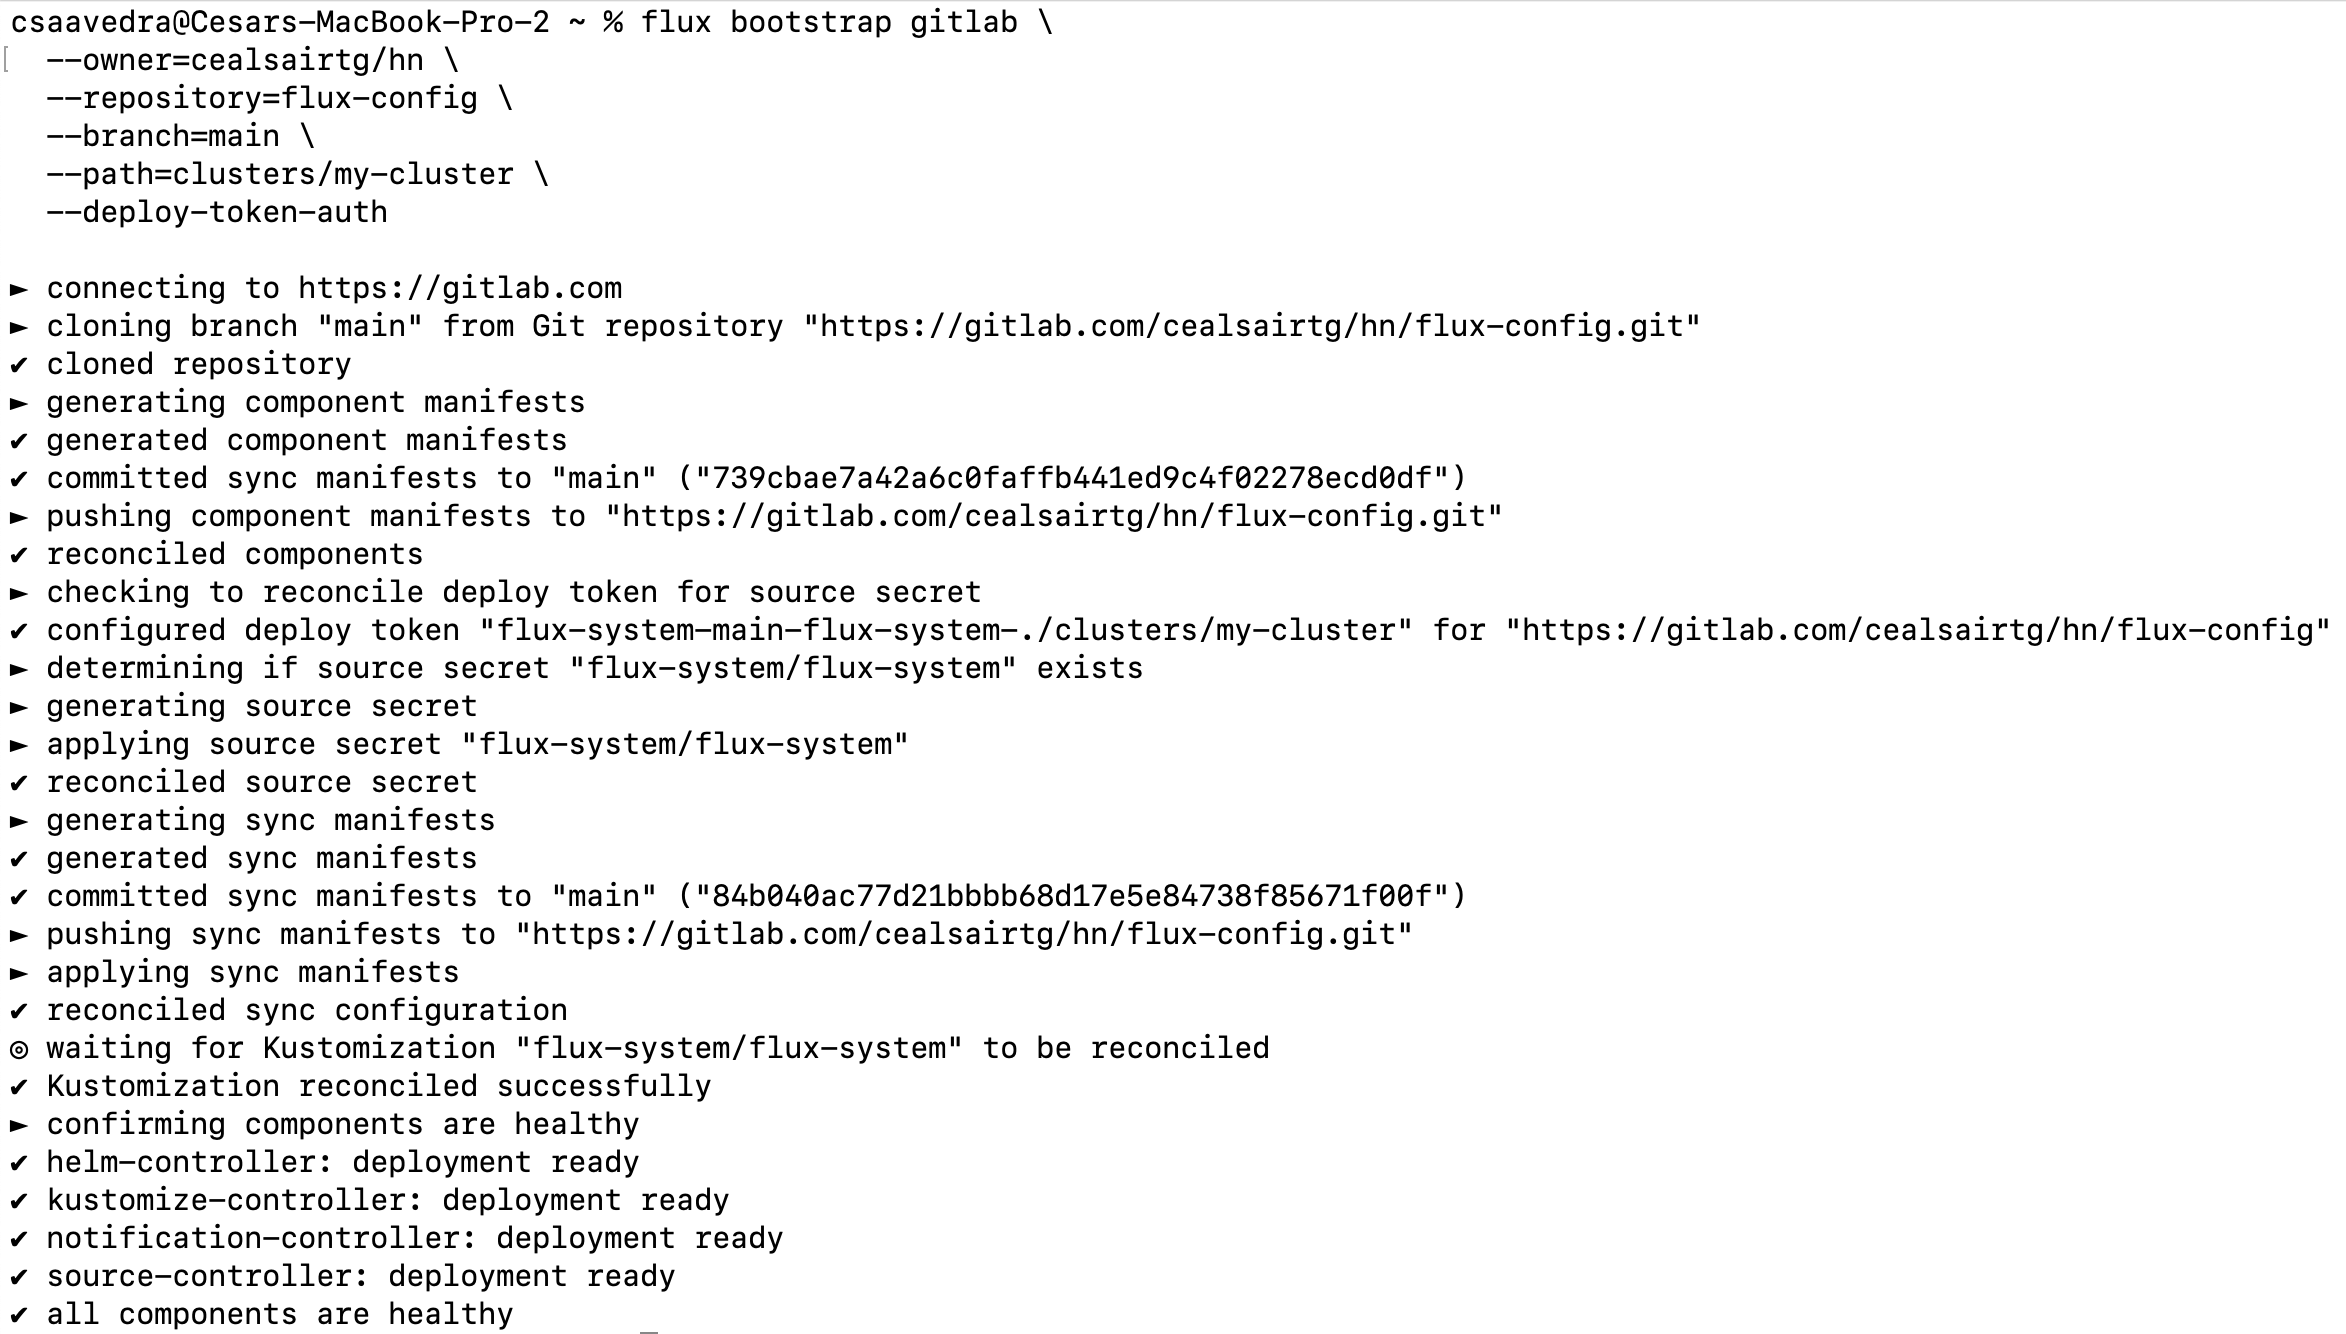
Flux bootstrap output
The “flux-config” project should now contain new directories and files as shown below:

Project flux-config post flux bootstrap process
- Head over to project hn/flux-config and create file “.gitlab/agents/k8s-agent/config.yaml” by clicking on the + sign next to the “flux-config” and selecting New file. Paste the following into it the new file:
Note: Make sure to replace <your path> with whatever precedes your group “hn”. For example, it could be - id: tech-marketing/sandbox/hn or if your group “hn” is at the very top level of your GitLab workspace, it would be - id: hn.
ci_access:
  groups:
    - id: <your path>/hn
Commit this file to main by clicking on the Commit changes button and ensuring that the target branch is “main”.

Creating the GitLab agent for Kubernetes configuration manifest
- Head to Operate > Kubernetes clusters and register the agent by clicking the Connect a cluster button.
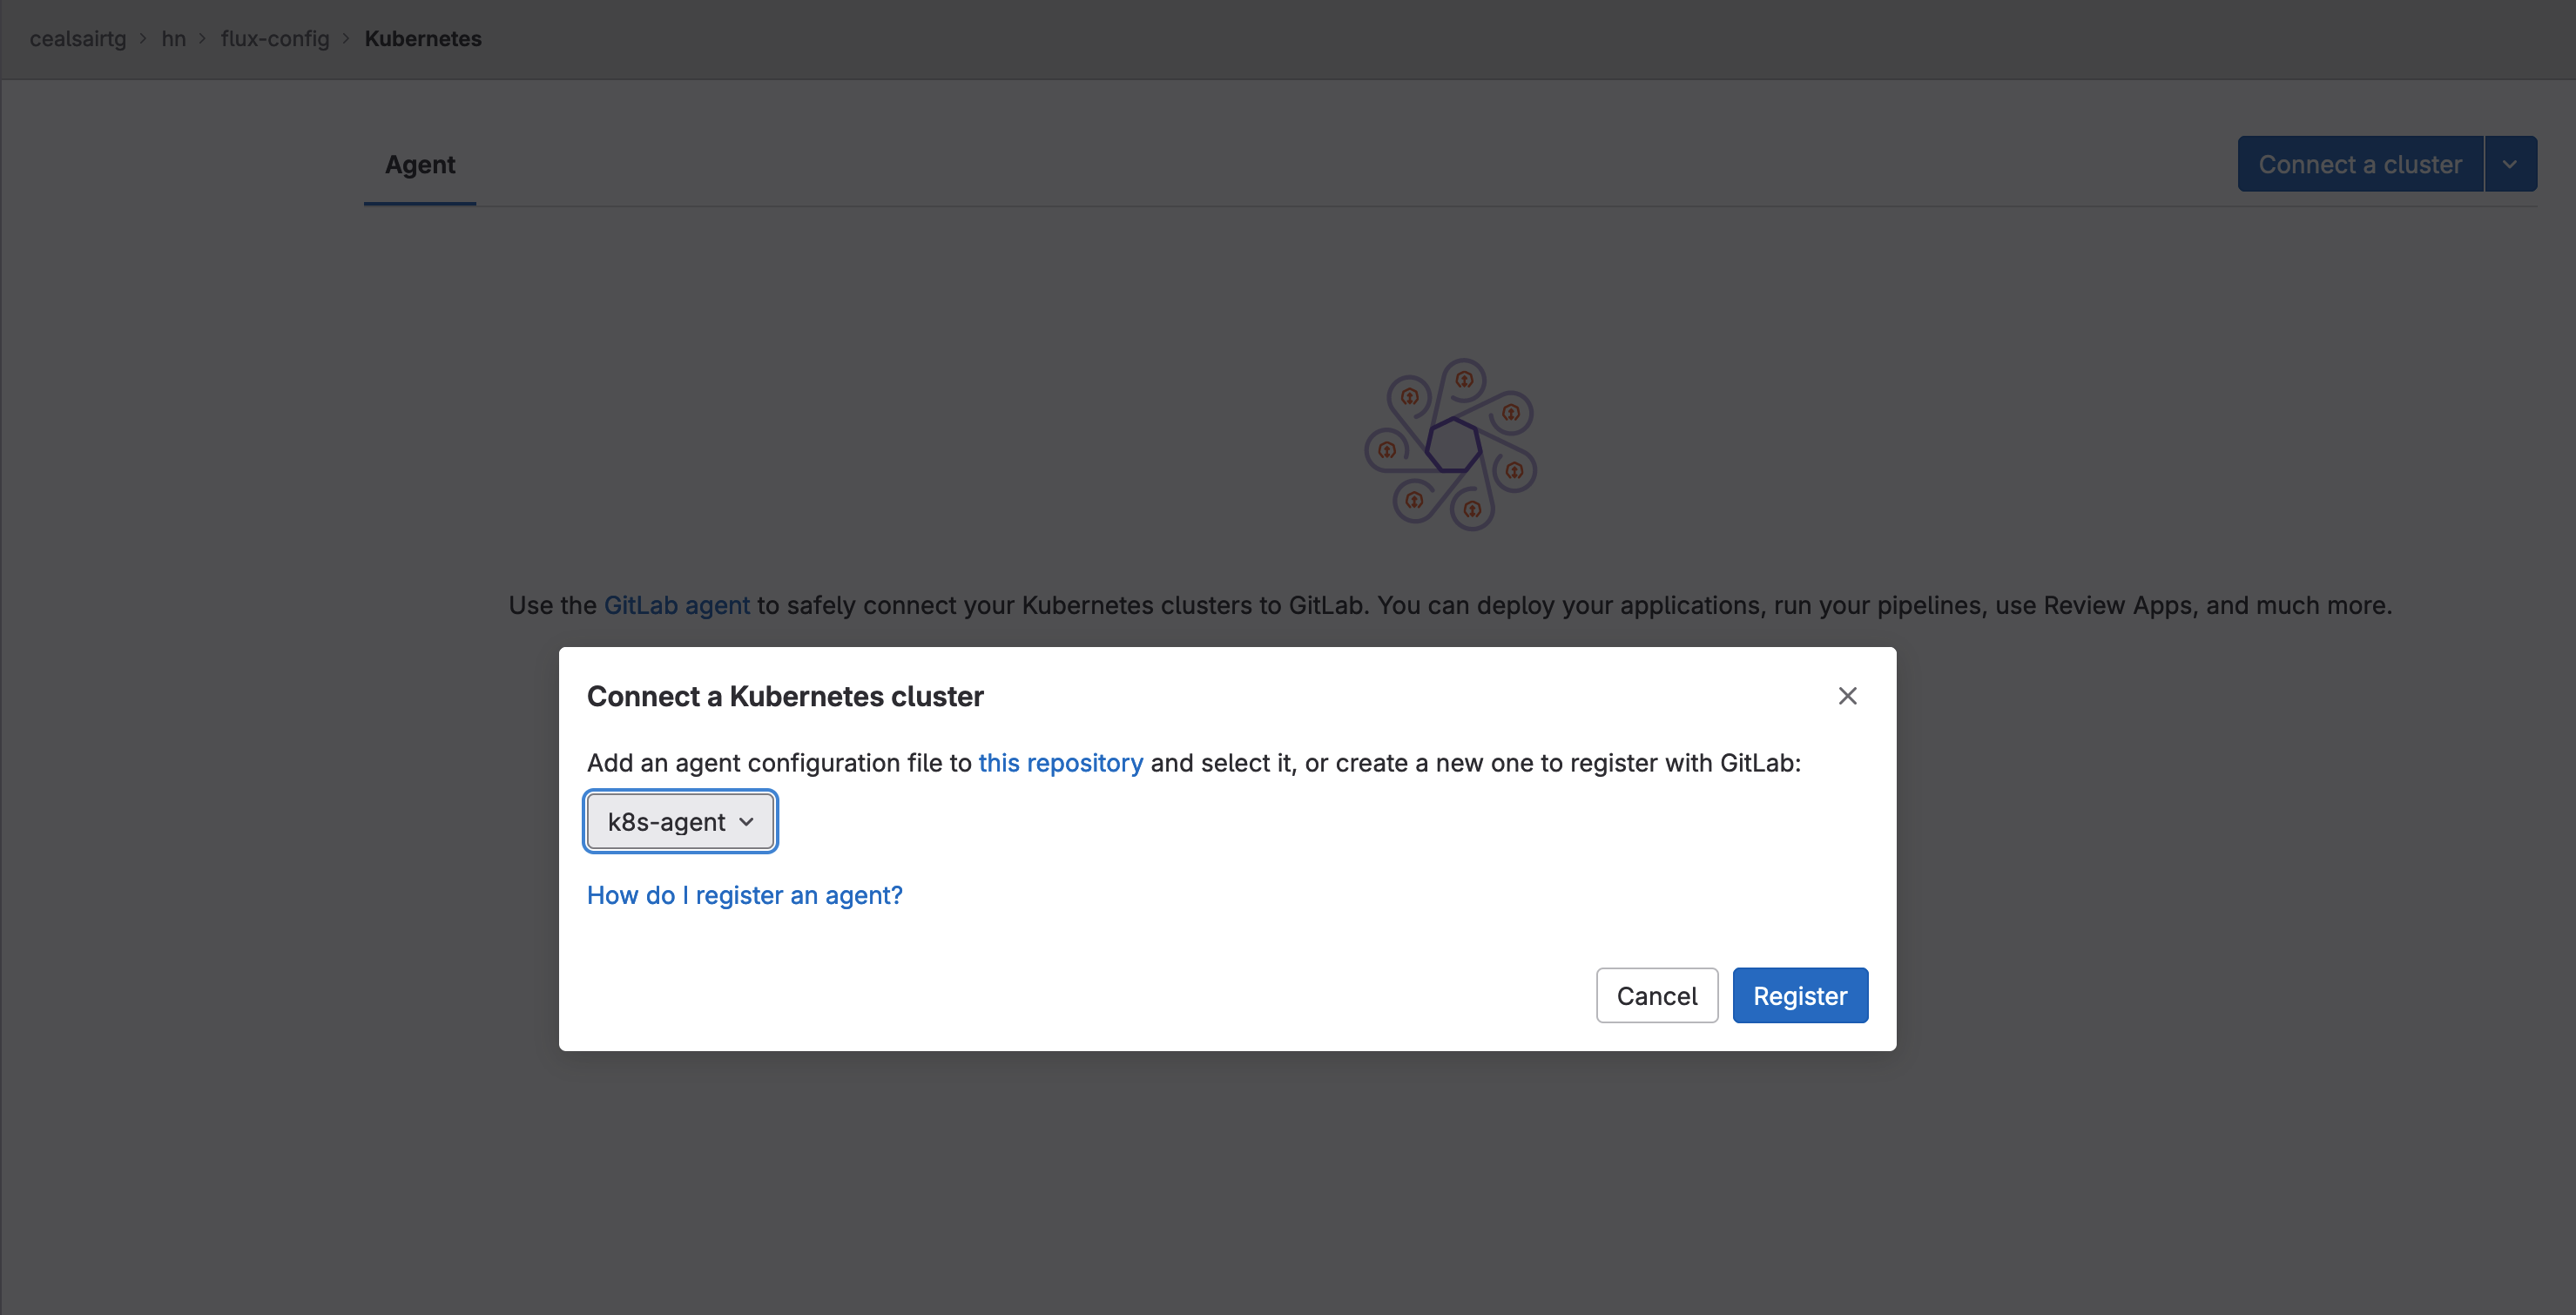
Registering the GitLab agent for Kubernetes
- On the “Connect a Kubernetes cluster” dialog, click on the popdown list and select agent “k8s-agent”. Click on the Register button. The dialog will refresh and show the Agent access token. Copy and save the Agent access token; you will need it at a later step. Close the dialog by clicking on the Close button.
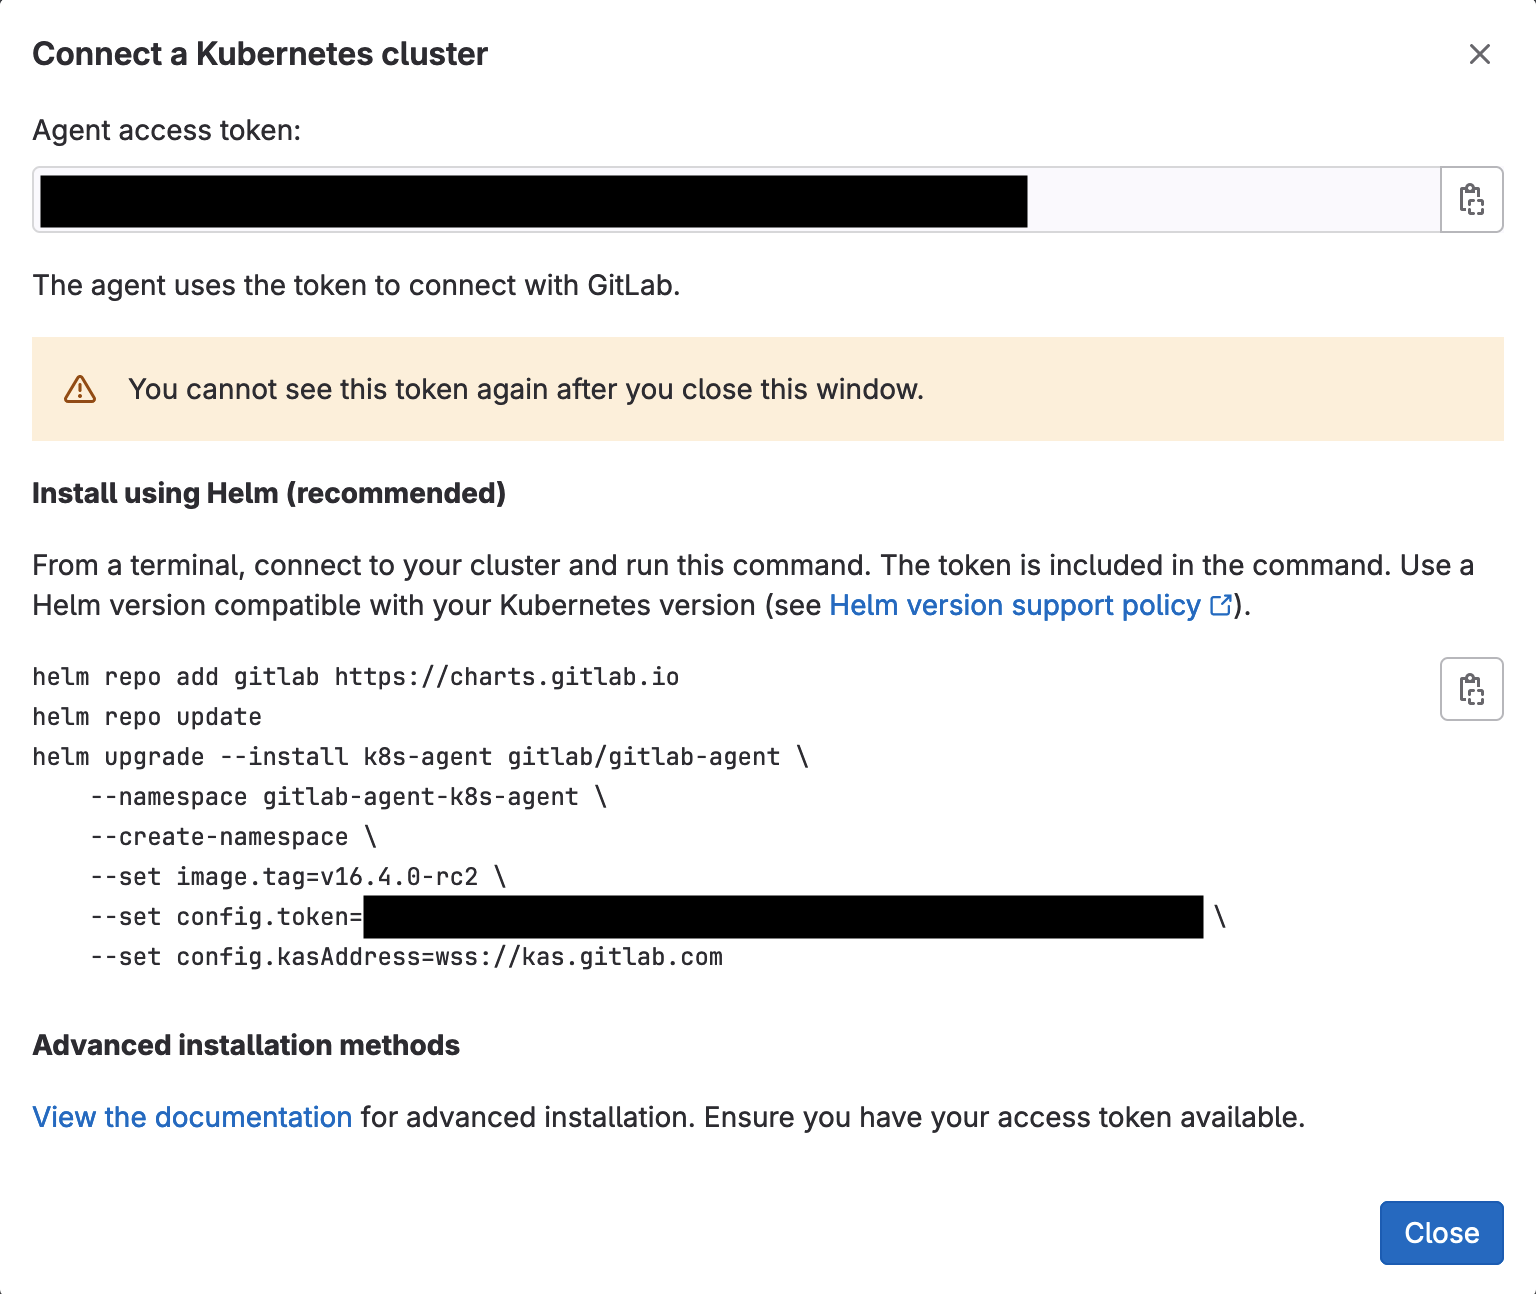
The agent access token to save
At this moment, you will see the agent listed and its Connection status will be “Never connected”.
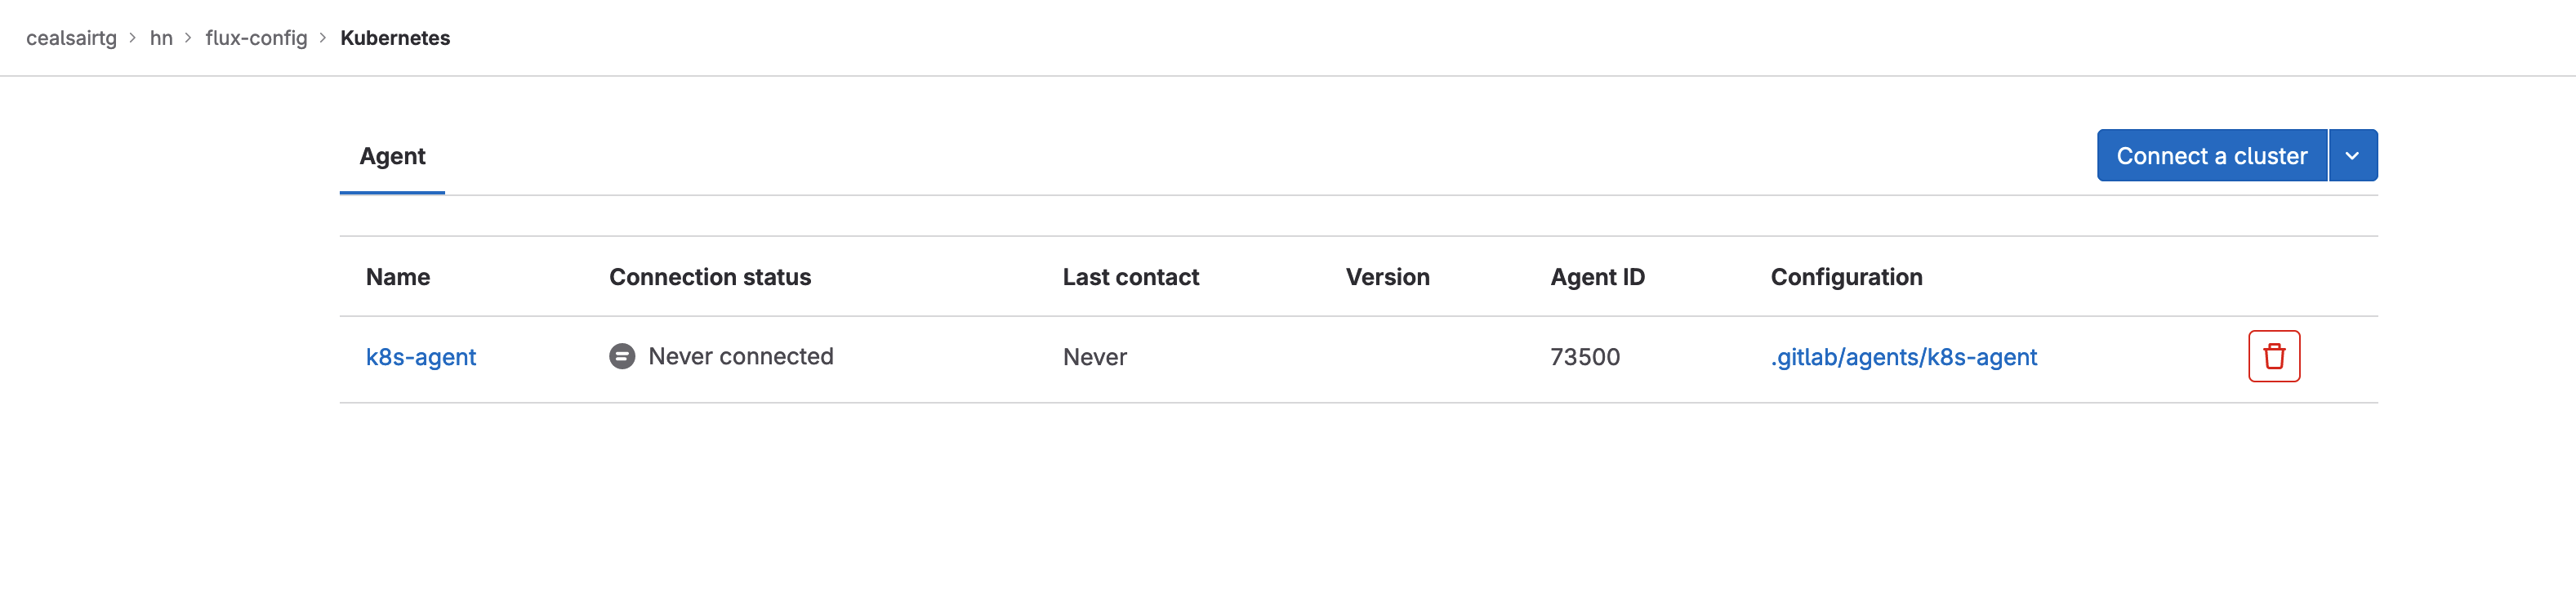
Agent registered but not connected yet
- Head to flux-config/clusters/my-cluster directory and create a file named “namespace-gitlab.yaml” and paste the following into it:
apiVersion: v1
kind: Namespace
metadata:
  name: gitlab
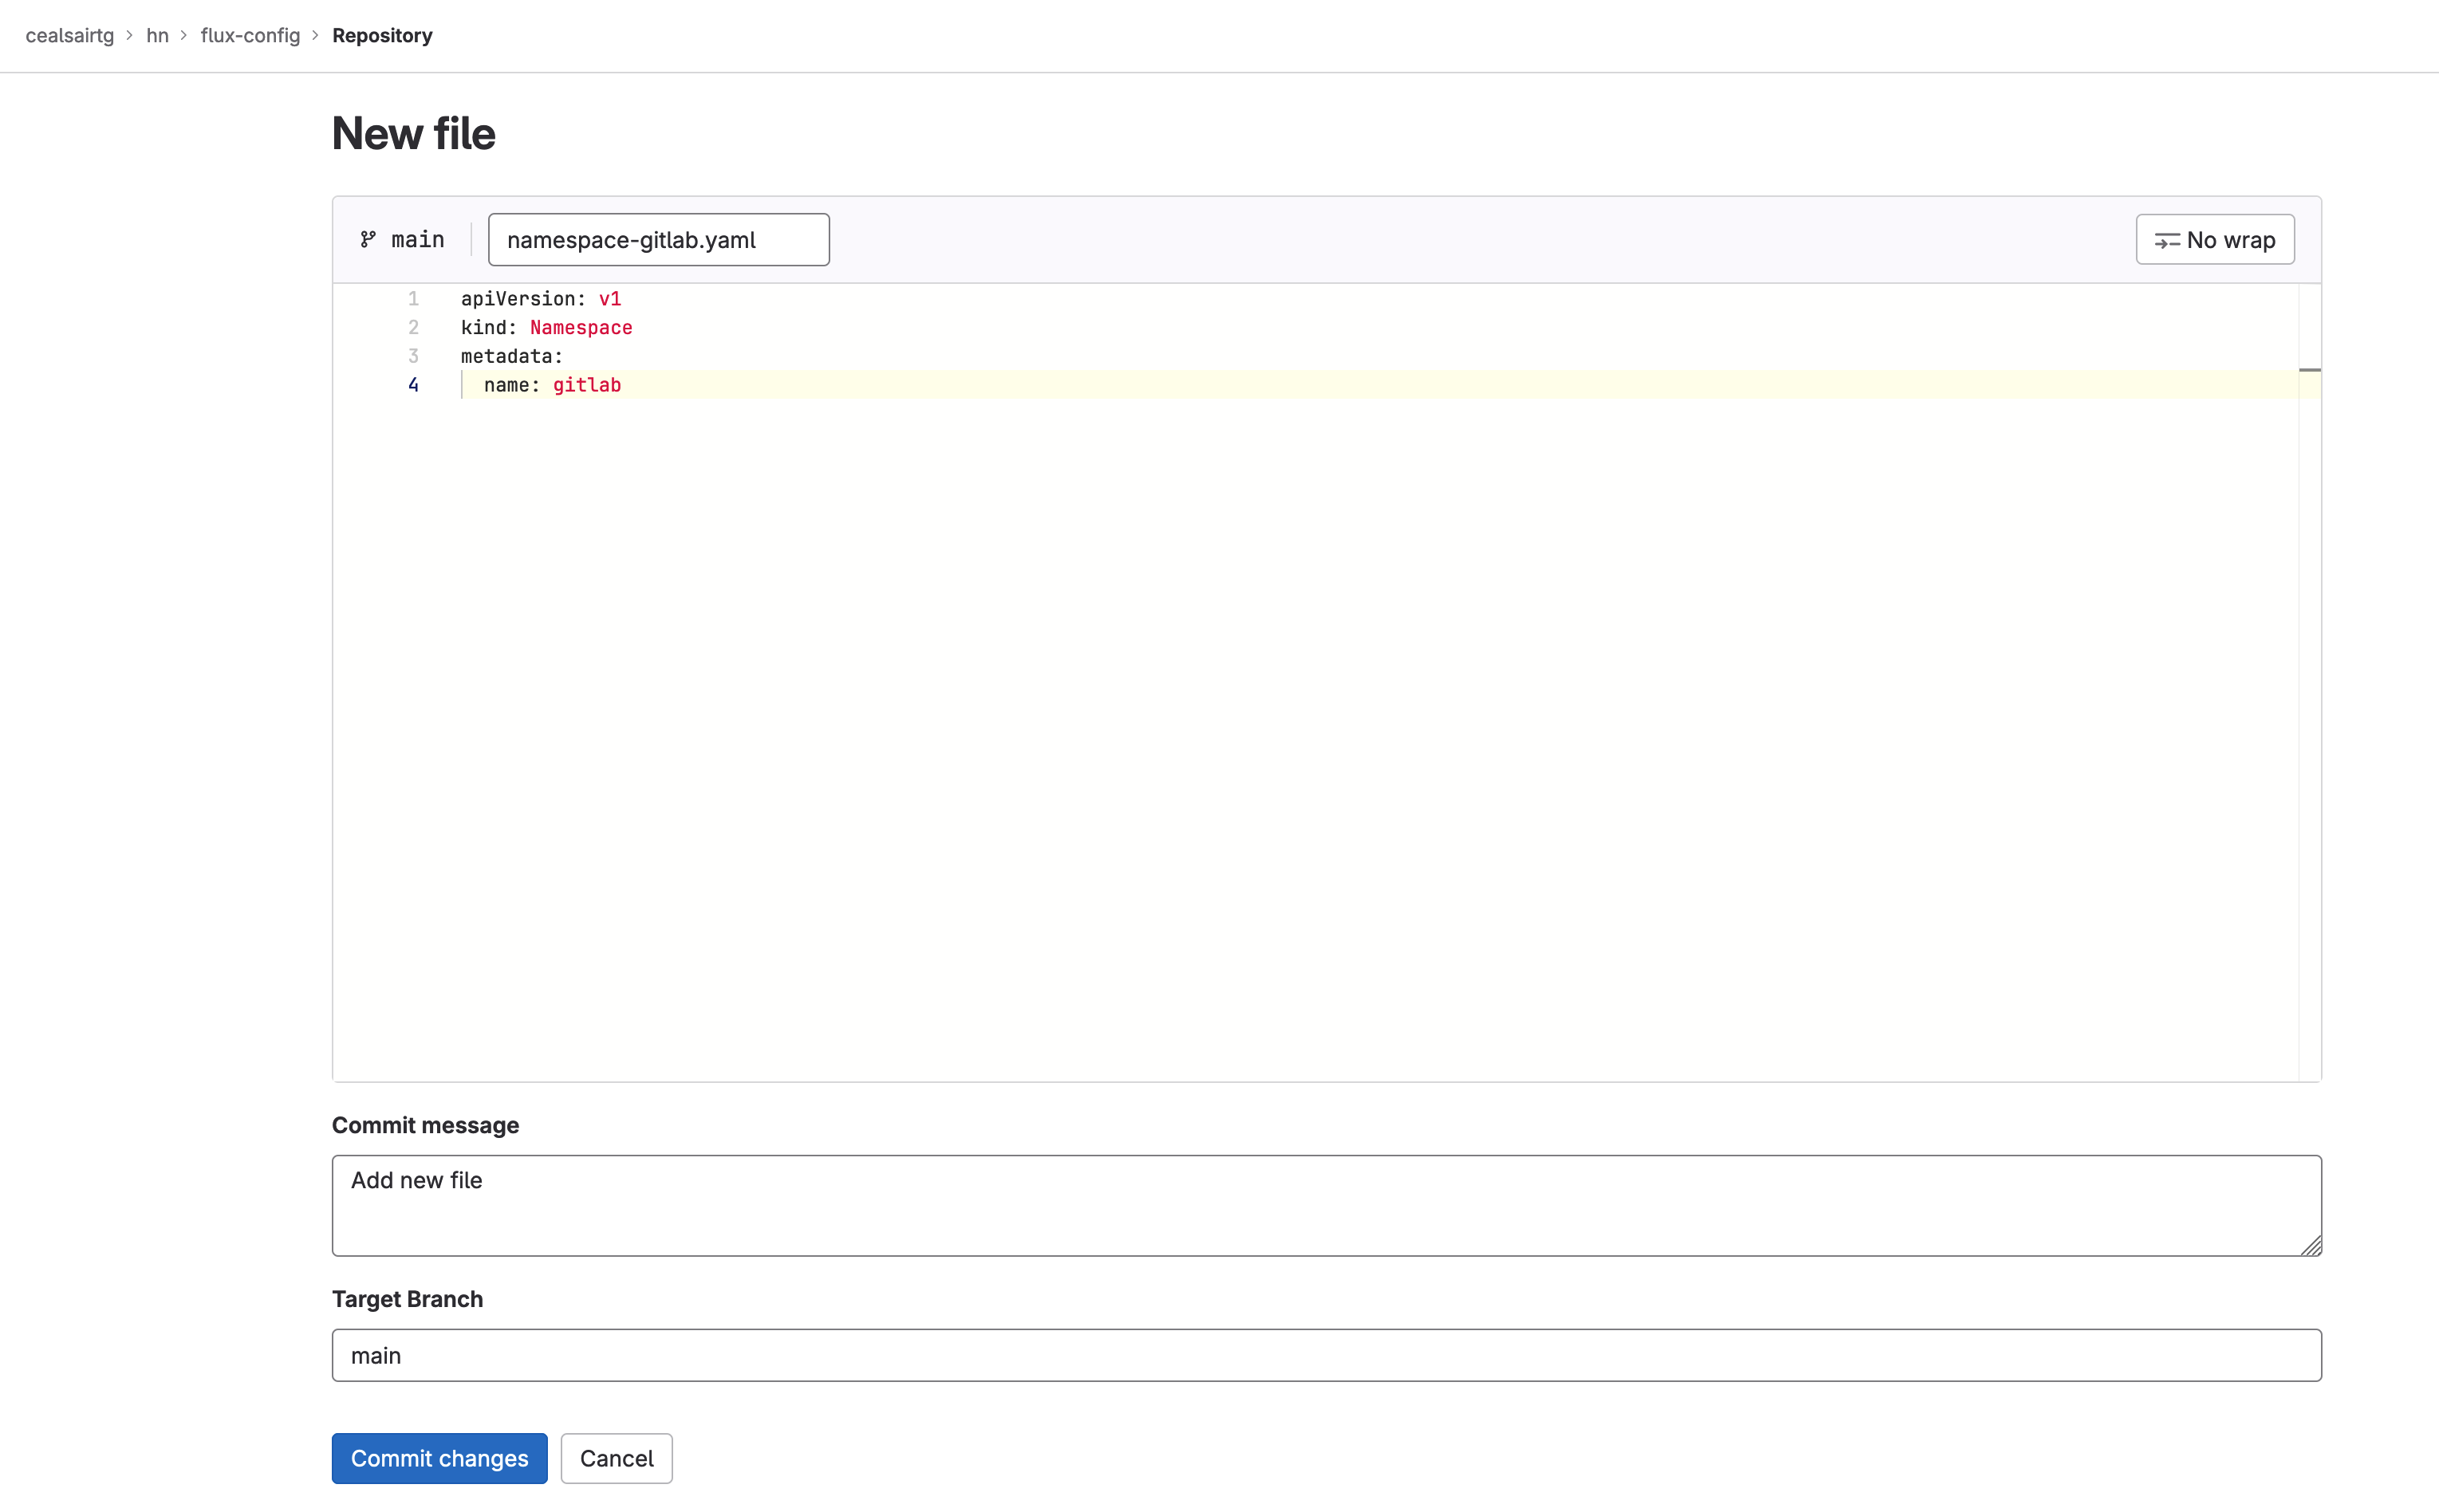
Manifest for the gitlab namespace
Commit this file to main by clicking on the Commit changes button and ensuring that the target branch is “main”.
Note: You can check that the namespace was created in your cluster by executing this command from a Terminal:

kubectl get ns
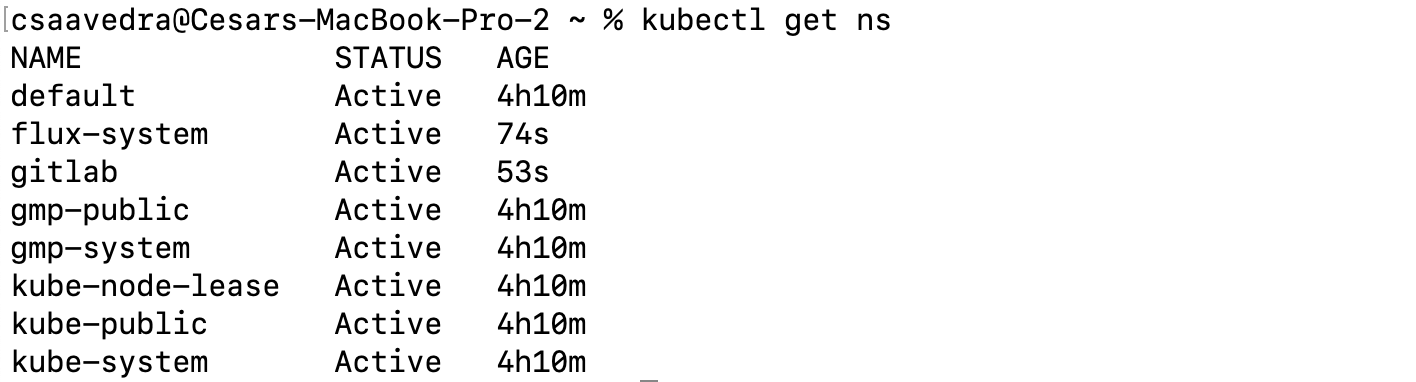
Flux created gitlab namespace
- Before we have Flux deploy the GitLab agent for Kubernetes to your cluster, we need to create a secret, containing the Agent access token you saved earlier, in your cluster. Create a file named “secret.yaml” in your local desktop, paste the following into it and then save it:
Note: Make sure to replace <your-agent-access-token-here> with your Agent access token you saved earlier.
apiVersion: v1
kind: Secret
metadata:
  name: gitlab-agent-token-initial
type: Opaque
stringData:
  values.yaml: |-
    config:
      token: "<your-agent-access-token-here>"
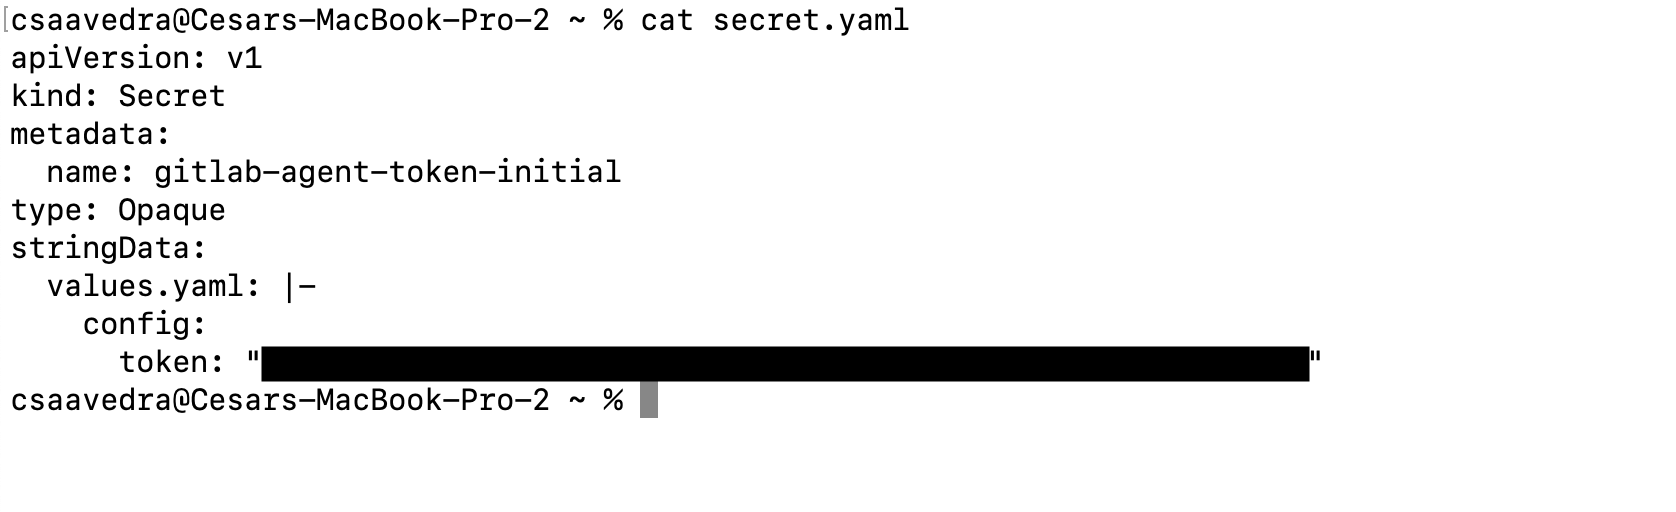
Manifest for agent token secret created on local desktop
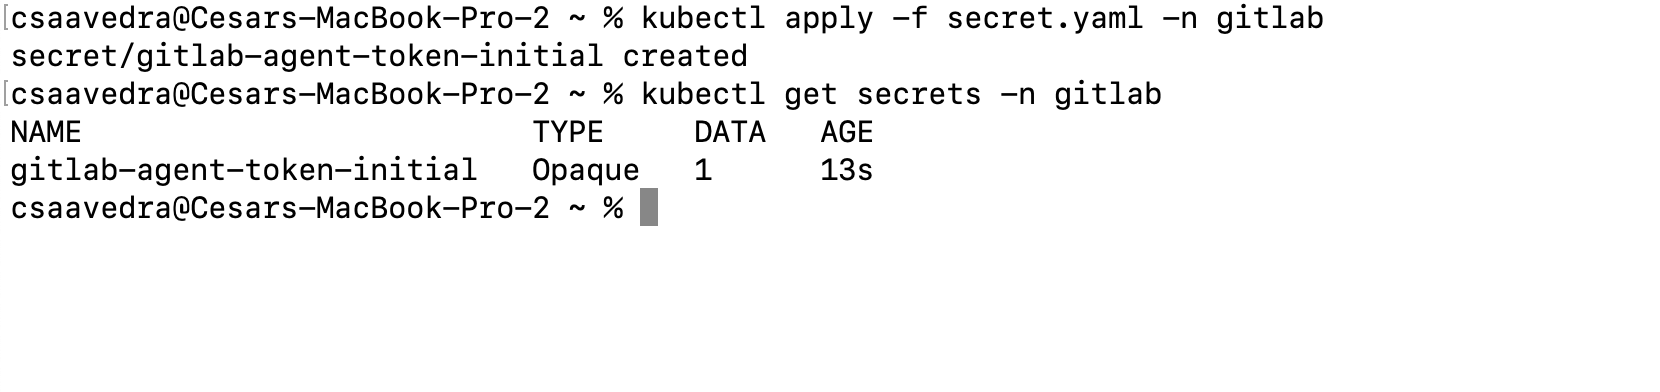
- Create the secret in your cluster by executing the following command from a Terminal:
kubectl apply -f secret.yaml -n gitlab
Note: You can check that the secret was created in your cluster by executing this command from a Terminal:

kubectl get secrets -n gitlab
Applying the agent token secret to the Kubernetes cluster
- Now let’s use the Flux Helm Controller to deploy the GitLab agent for Kubernetes to your cluster. Head to flux-config/clusters/my-cluster directory and create a file named “agentk.yaml” and paste the following into it: